You may have noticed how much pollen is in the air now that temperatures are warming and spring is in full bloom. If you suffer from spring allergies like I do, you’ve probably been dealing with a runny nose and eyes, fits of sneezes, and other unpleasant side effects of the burgeoning season. Indeed, pollen gets on a lot of people’s nerves. It can seem like an obstacle preventing us from enjoying spring to the fullest, but, ironically, spring needs pollen to thrive. More specifically, spring needs pollinators—animals such as bees and butterflies that carry pollen from one plant to another and aid in plant reproduction—to sustain all of its famous colorful blooms. Pollinators support the building blocks of all ecosystems, and they are essential to environmental health. Humans and animals alike need them to survive—the least us human gardeners can do is create pollinator-friendly gardens. So take an allergy pill, power through your sniffles, and consider these tips for attracting pollinators to your yard:
green gardening
Throwback Gardening: Timeless Practices
In this day and age, new technologies are changing the way that people garden and digitizing plant science. There are cellphone apps that can instantly identify plants, help you plot, figure out your soil pH, and keep track of watering schedules for you. There are also highly sophisticated irrigation systems, mowers, and even planting pots on the market—but all of these newfangled gadgets are derivatives of what came before them. For many thousands of years, gardeners have been expanding on basic practices that are both timeless and amazingly effective. Here are some tried and true ancient gardening practices that still hold up today, smart phones be damned!
Straw Bale Gardening
There’s no shortage of straw bales in Southwest Virginia, which is good news for fans of organic gardening. Though not used as frequently as compost or fertilizer, straw bales can help rectify problems associated with nutrient-poor soil. With a little conditioning, straw bales work as organic raised beds that help feed and fortify plants with minimal effort on the part of the gardener. Plus, straw bale plant beds fit perfectly into fall garden designs—just add a couple of pumpkins and some hot apple cider!
Drip Irrigation FAQ
For the past few weeks, Roanoke Landscapes has been busy turning on irrigation systems for our clients. This dry, hot weather makes irrigation systems especially appealing. Automated watering systems are smart, reliable, and efficient in climates where rain is sporadic or scarce. They make the difficult task of keeping lawns and gardens well hydrated into something that is almost mindless: push a button, select a watering schedule, and suddenly all your watering is done for you. Simple, right?
In fact, every year irrigation systems are getting more advanced, efficient, and easier to operate. Irrigation as an agricultural concept has been around for some 5000 years, meaning there has been ample time for invention and progress within the irrigation industry. As irrigation professionals, we always try to keep up with the latest trends, gadgets, and water-conservation methods. Our clients often come to us with questions about the best tried-and-true irrigation methods, and something they’ve been particularly curious about lately is drip irrigation.

Photo by Joby Elliott.
Can a Warm Winter Inhibit Spring Growth?

Photo by Raymond Cocks.
So far, most of the United States has had an unusually mild winter. For some, this unseasonably warm weather means being able to spend more time out in the garden or working on landscaping projects. Others, however, worry about how bizarre temperature fluctuations might affect spring plant growth. As global temperature averages continue to rise, climate scientists have been compiling research on how these changes can help or hurt various ecosystems. Their findings show that warm winter weather may be a mixed bag for gardeners, benefiting some plants while harming others.
The success of spring growth depends on more than just temperature; plants are also effected by precipitation levels, soil chemistry, and other ecological factors. However, mild winters are often accompanied by dryness, and that, in turn, can effect soil chemistry. In the northeast, gardeners worry that dry, mild winters could endanger tulip bulbs and fruit tree productivity. In the south, gardeners worry that warm winters will hurt plants that need cold, dormant days to flower, such as peonies. Adversely, plants that do well in warm temperatures—such as magnolias—could thrive after warmer winters.
One big downside of a mild winter is an increase in pest populations come spring. Freezing temps push pests into hibernation or kill them off. When winters are mild, pests can multiply throughout the season, which can spell big trouble for gardeners. Just yesterday, I found a mosquito on the hood of my car. I don’t even want to imagine how many of them I’ll find in June.
Additionally, plants and animals that hibernate during the winter could become “tricked” by a couple weeks of mild temperatures and begin to grow or come out of hiding. Since winter temperatures often fluctuate, these plants and critters could be hit by a hard freeze or snow storm later in the season. Many plants and smaller animals—such as frogs or salamanders—can be killed by a bad freeze. An early winter mulching can help insulate plants against temperature fluctuations, insuring that their biological clocks won’t be stumped by unusual weather.
Enjoy the mild winter by spending more time outdoors, but don’t forget to check on your plants often. This year, you may have to take extra precaution to prevent against pest infiltration and late season freezes. If you stay ahead of the forecast, you should be able to stay in control of your garden.
Smart Gardening: Best Apps for Your Garden
For some, gardening is a way to escape from the endless buzz of technology. Texts, emails, and work notifications can easily disturb the peace that comes with cultivating your own flowers and produce. On the other hand, technology has been a great aide to gardeners, allowing them to schedule, plan, and keep track of productivity with ease. So, while “app” and “gardening” may seem like polar opposites, gardening apps are becoming increasingly popular with (I think) good reason. Smart gardening apps can help gardeners maximize the peaceful, fun aspects of gardening while minimizing stress. If you’ve yet to give them a try, it’s worth a shot. I know there’s a lot of choices out there (there’s an app for everything, after all!) so here’s a list of starting points. Who knows, some of these might just change the way you garden forever!
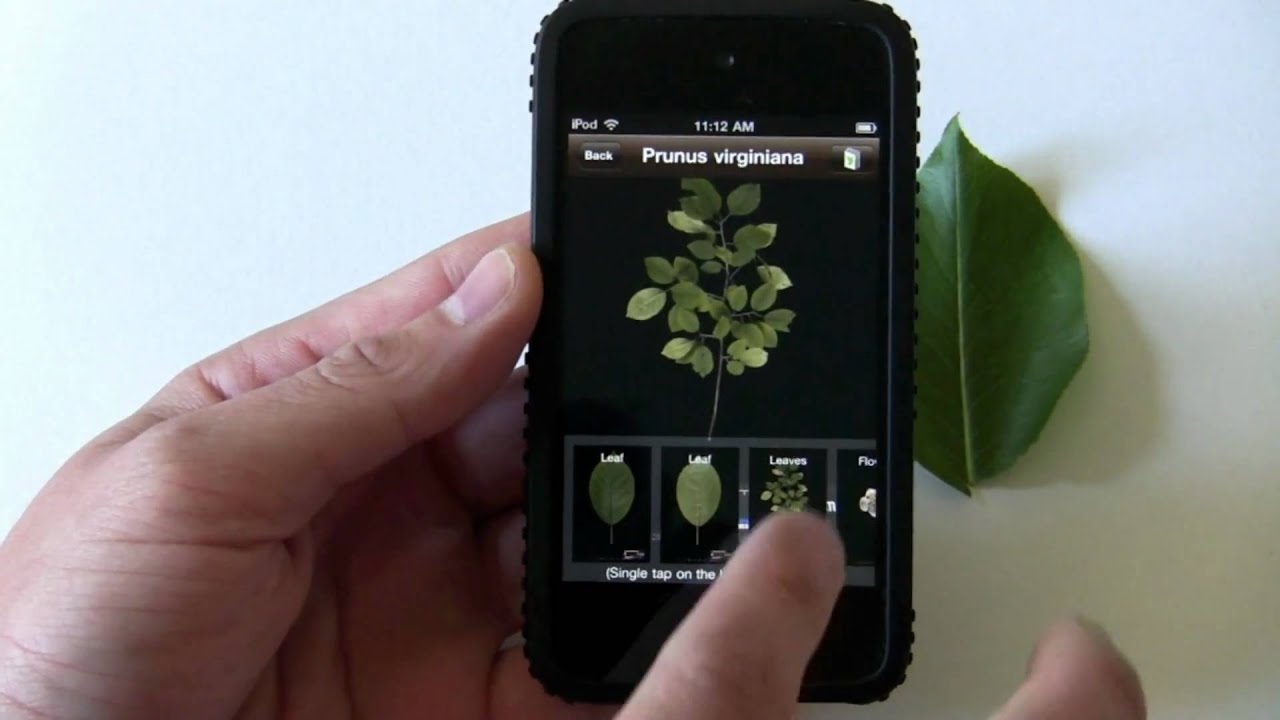
Leafsnap
Have you ever used the song identifying app “Shazzam?” This is a lot like that, except it’s for trees and shrubs instead of songs. You simply pluck a leaf from the tree or shrub you’re trying to identify, photograph it against a white background, and then the app will show you what kind of plant the leaf came from. This is especially useful for gardeners who get major “garden-envy” when they’re trying to plan next year’s plantings.
Perennial Match
Perennial match is an app that helps you plan before you plant. It can tell you what kind of plants do best when grown next to each other, what kind of plants thrive in your climate zone, and it will even take into account height preferences and shade tolerances! It’s basically a little encyclopedia of plant knowledge that you can carry in your pocket.
Garden Compass Plant and Disease Identifier
Pest and disease identification and treatment is one of the hardest jobs a gardener has. This app makes it significantly easier to get your plants the help they need, fast. If you notice any strange ailments in your garden—curling leaves, discoloration, dry spots—you can use this app to snap a picture and send it to an expert who will diagnose the problem and offer a potential solution. It’s not foolproof, but it certainly cuts down on time spent troubleshooting on google!
Life Diary
This simple app is a great organization tool for busy gardeners who have trouble keeping up with all their day-to-day tasks. With Life Diary, you can log when you water, fertilize, and add new plantings to your garden. The app will also map your gardens growing progress for you, so you can spend more time doing and less time wondering what you’ve already done!
Garden Squared
Garden Squared allows you to virtually lay out gardening plots and try out different bed dimensions before you begin building. You’ll never have to deconstruct a poorly-planned garden bed ever again!
Landscaper Companion
True to its name, this extensive gardening app is the ultimate companion for both amateur and professional landscapers. With detailed information on more than 26,000 plants, Landscaper Companion is the ultimate resource for just about anyone who spends a lot of time in nature. Even casual hikers could benefit from having this virtual encyclopedia close at hand. After all, nobody likes finding out a plant is poisonous after they’ve touched it.
Was this article helpful? Visit our website http://www.roanokelandscapes.com/ for more tips and tricks!
Green Gardening Secrets: Native Planting
“Going Native” has become a popular topic of discussion in green gardening communities, and landscaping companies are taking note. Building off of research that attests to the benefits of native planting, landscapers have begun offering their customers more native foliage options. It shows their dedication to sustainability and their local expertise. But why the renewed interest in native planting? What do native plants offer that non-native plants do not?

Native Planting Builds Healthier Ecosystems
Expanding urbanization and development has destroyed a significant amount of animal habitats throughout America. Native wildlife is continually being relocated and pushed away by the construction of highways, strip malls, and housing developments. Native planters are fighting back against this destruction by creating habitats for native wildlife in their own backyards. These habitats provide food and shelter for displaced animal species and contribute to a healthy local ecosystem, so that valuable bird, moth, butterfly, insect, and mammal species can continue to thrive.
Native Planting Fights Invasive Growth
Native planting also provides benefits to homeowners. Many gardeners worry about invasive species of plants and animals destroying crops and smothering foliage. Ironically, it was landscaping companies that introduced many of these invasive species as exotic options in their landscaping plans. Now, these exotic plants have grown uncontrollably and are hurting local ecosystems. By planting more native plants, homeowners are protecting their yards—and the yards of many others—from the destructive effects of invasive growth.

Native Plants are Low Maintenance and High Reward
Because native plants have evolved specifically to exist within your local ecosystem, they are much sturdier and more reliable than non-native plants. They require less specialized care and are more accustomed to the rainfall and temperature levels of your climate. A garden filled with native plants will probably cheapen your water bill, lighten your pesticide and fertilizer usage, and free up your time!
As an added bonus, native plants are gorgeous additions to any landscape! They are guaranteed to blend seamlessly into your landscaping design while providing you with some awesome natural benefits. Here are a few plants native to Virginia that you might consider planting next season:
- Autumn bentgrass
- Broomsedge
- Butterfly weed
- Blue wild indigo
- Woodland sunflower
- Dwarf crested iris
- Canada lily
- Lupine
- Virginia bluebells
- Black eyed Susan
- Red maple
- American beech
- Black walnut
- White pine
- Witch hazel
- Catawba rhododendron
These are just a few options. Go to http://www.dcr.virginia.gov/natural-heritage/np for more ideas and information on native planting! Happy gardening!
Green Gardening Secrets: Making a Rain Garden

In these hot, dry summer months, you may be looking for a way to conserve water and cut down on your bills without neglecting your plants. We don’t blame you. Water bills are expensive and manual watering is time-consuming. If you are looking for an alternative, building a rain garden in your backyard conserves rain water while also helping the environment. It’s a win win!
What are Rain Gardens?
Rain gardens serve a couple main purposes: for one, they funnel rainwater runoff from downspouts into planting beds and surrounding areas of soil. They also filter water runoff, sponging out harmful chemicals. Typically, when water comes off a downspout, it travels through your yard, oftentimes picking up pesticides and fertilizers on the way. Then, it goes into a storm drown that eventually dumps it into rivers and streams, where chemical pollutants in the water can hurt native plant and animal species. Polluted runoff is bad news for ecosystems, and installing a rain garden is one way of combatting its negative effects.
How Do I Build One?
First, you want to find a place to put your rain garden. You should chose an area at least 10 feet from your house, away from septic systems or significant slopes. You should then test the area’s absorbency capabilities. To do this, you can dig a hole approximately 2 ft deep and fill it with eight inches of water. You want the water to be fully absorbed in twelve hours or less. If water is still sitting after 12 hours, this area may not be suitable for a rain garden. Remember, before you dig, you should call your local utilities department to make sure your dig spot is safe and away from utility lines.
After choosing placement, you should decide on size. Rain gardens can be up to 150 square feet (or bigger) if you have the room, but even a small rain garden can help manage your runoff considerably. When you are marking the size of your garden, you should also take into account where the water will flow in to the garden and where it will flow out.
Next, strip away the lawn on top of where your garden will be by slicing off grass roots with a sharp spade or a sod cutter, which you can rent from most hardware stores.
After that—and this is the hardest part—you are going to have to do a lot of digging. You will probably want help, or you can consider hiring an excavator operator for a quicker job. You’re going to want to dig out the entire interior of your rain garden about 18 inches deep. If your garden is slightly sloped, you may want to install a berm soil wall on the lower side—about two feet wide at the base and one foot wide at the top.
You will also need to dig a trench than can carry rain water from downspouts to the rain garden. Within the trenches, you will need to install piping. Corrugated tubing is easy to work with, just make sure to get the kind without perforations. The pipe should reach about a foot into the rain garden basin. For extra durability, you can put stones over and around the pipe. Once the piping is down, fill in the trenches with soil.
You’re then going to fill back in the basin. You want all but the top ~six inches to be filled with rain garden soil (approx. 60% native soil and 40% compost). The sides should be slightly sloped, and stones can be packed around the edges to decrease the chance of erosion.
Then you can start planting! Group plants by their water tolerance levels. Plants that do well in wet environments can go towards the center, plants that can handle standing water should go towards the sloped sides, and plants that like drier conditions can go on the outer edge. Once plants are planted, be sure to mulch and water regularly until they are well-established.
After your plants are thriving, your rain garden is complete! The plants will filter the water through their roots and release clean water slowly into the surrounding yard. You yard will stay hydrated via the recycled storm water and you won’t have to worry about dangerous runoff! It’s a big pay-off for about a week of work.
Did you like this article? Check out our site for more tips, blogs, and photos of the work we do!
Green Gardening Secrets: Compost!
Good, fertile soil is like black gold to gardeners. It is invaluable resource that, in many places across the U.S, is unfortunately hard to find. Regular applications of fertilizer can help add nutrients to nutrient-poor soil, but, for money-conscious gardeners, there is a cheaper, all-natural solution that can be made right at home.
Composting isn’t an invention of the modern, eco-conscious age; it has been made and utilized by farmers for centuries. When added to clay or sandy soil, it improves the soil’s water-retention and gives seedlings a nutrient-rich feast. In some climates, it is one of the only ways to sustain a bountiful harvest. Now, many homeowners have begun their own compost piles in hopes of being able to turn trash into a useful and money-saving resource.

What is Compost?
Compost, most simply, is decomposed organic material like leaves, twigs, and fruit and vegetable scraps. In nature, dead organic material is constantly being broken down and recycled by fungi, insects, and animals. The product of this recycling is rich, nutrient-dense soil that can be used to create new life. Building your own compost pile recreates this process by turning your trash (banana peels, egg shells, dead leaves) into soil that can then be used in your garden.
Where Do I Keep Compost?
Out in the garden is probably your best bet. You can leave it piled, but it looks more contained when put into something. Your container should be at least 3ft by 3ft to allow for enough sifting room. You can easily build a container out of wood, re-purpose a Tupperware bin into one, or buy one at almost any garden store.
How Do I Make Compost?
To start, you’re going to need organic material, oxygen, moisture, and bacteria. In this case, organic matter means trash, but not just any kind of trash. You want to include a mix of brown organic material (manure, dead leaves, shredded paper) and green organic material (grass, fruit rinds, coffee grounds). You want to have approximately equal parts of both, or more of the brown material if you want to speed up the process. And, remember, the smaller the organic material is, the faster it will decompose.
Tip: NEVER compost with anything containing meat, fat, oil, grease, or dairy products. This will turn your compost pile into a putrid mess!
Moisture is essential to the decomposition process. Your compost should have a moisture level similar to that of a damp sponge. If your compost gets dry, add some water until moisture levels are at where you want them to be. If the compost gets too wet, dry it out by mixing it up or adding more dry brown organic material.
Oxygen also aids the decomposition process. To oxygenate your compost, turn the pile occasionally (every two weeks or so) to break it up. The center of the pile will heat up as decomposition occurs; wait until the center cools to turn your compost, or else you may interrupt the decomposition process prematurely.
Bacteria will naturally be produced as the organic material rots. These bacteria will do most of the labor in the decomposition process, breaking down and recycling nutrients. Some composters chose to add earth worms to their pile to speed up decomposition. Earth worms make fast work of trash, and they can help cut down on the cloyingly sweet smell that compost bins tend to produce when they are hot (in the middle of the decomposition process).
When Will My Compost be Ready?
This questions depends on a number of factors: how large the compost pile is, what kinds of materials are in there, how many times the pile has been turned, and what kind of bacteria are at work. Most piles are between 27-125 cubic feet. Compost piles of this size are generally ready to use in about three months, which makes a compost bin the perfect summer or spring project! When it is ready, you can use it as you would mulch or fertilizer on beds and grass.
 Finished “Black Gold”
Green Gardening Secrets: Building Ecosystems
Keeping a “green” garden is about more than the lushness of your plants. A green garden is a sustainable, energy-saving, eco-conscious garden that conserves limited (and expensive) resources like water and power by working more efficiently. Green gardening takes many different forms, and most gardeners are well aware of how to conserve and save. That being said, almost all gardens could be working more efficiently. That’s why we are doing a multi-part blog series dedicated to giving our readers some “green” ideas that they can take with them when designing and maintaining their landscapes, because the best gardens work their hardest to preserve and accentuate natural beauty, not take it away.
Eco gardening cuts down on waste, reduces energy consumption, and goes easy on our delicate climate. The first step to creating a more “green” garden is going back to the roots of what a garden is: an ecosystem that you have created right outside your home.
That means your garden is going to be filled with bugs. This might have its fair share of negative connotations, but green gardeners know that there are just as many good garden bugs as there are bad garden bugs, and good bugs can act as great fortifiers and all-natural pesticides against harmful infestations. Ladybugs and lacewings, for example, love eating aphids, a common garden pest. By planting flowers that attract ladybugs, like marigolds and sunflowers, you can create a natural defense against pests. In this way, you are building a stronger garden ecosystem and eliminating the constant need for chemical pesticides.

Birds are also an important part of a garden ecosystem. Though they sometimes munch on our fruits and veggies, they also do a great job of controlling pests. By installing a few bird feeders around your yard, you can fight against snail, slug, and caterpillar infestations. This is a cheap, easy, and low-impact way of keeping pest populations under control.

In many ecosystems, organisms will naturally evolve together and provide protection and safety to one another. The plants in your garden are capable of the same thing. Companion planting is an age-old farming practice in which two plants that complement each other are planted together in order to encourage growth and durability. For example, tall sun-loving plants might be used to provide shade for short, shade-loving plants. Planning out your garden in this way will make your ecosystem more efficient and sustainable. You won’t have to work as hard to keep your plants thriving, and that usually translates into energy costs as well. Some good companion planting combos are: chives and tomatoes, rose and garlic, carrot and spring onion, melon and marigold, sweet corn and green beans, and cucumbers and dill!

Another point to consider: where is your garden growing? What is the weather like? How about the soil? What kind of native plants and animals live there? Including a variety of native plant species in your garden will certainly boost its longevity. Native species are used to the unique soil and weather conditions in your area, and they can better fight against droughts and disease. They also attract native animal species and can ward off invasive plant and animal life. Invasive plants like kudzu can severely harm your garden ecosystem if allowed to grow unchecked, whereas native plants are good for the environment and require less energy and resources to thrive. Native planting is yet another smart way to create a vibrant garden ecosystem.

These are just a few green gardening suggestions. Check back in for a more in-depth look at other green gardening techniques such as composting and building rain gardens. We look forward to seeing what kind of ecosystem you create!
